Quick Start
Get started with Bootstrap IntelliSense in minutes!
Installation
Via Marketplace
The easiest way to install is through the Visual Studio Code Marketplace:
- Open Visual Studio Code
- Press
Ctrl+Shift+X(orCmd+Shift+Xon macOS) to open the Extensions view - Search for "Bootstrap IntelliSense"
- Click "Install"
Via Command Line
You can also install the extension via the command line:
code --install-extension hossaini.bootstrap-intellisenseVia GitHub Releases
Download and install the latest release directly from GitHub:
- Go to the GitHub Releases page
- Download the latest
.vsixfile - Open Visual Studio Code
- Press
Ctrl+Shift+P(orCmd+Shift+Pon macOS) - Type "Install from VSIX" and select Extensions: Install from VSIX...
- Select the downloaded
.vsixfile
Tip
This method is useful if you want to install a specific version or if you're working in an offline environment.
Prerequisites
Important
For the extension to activate, Bootstrap must be installed in your workspace.
Install Bootstrap
If you haven't installed Bootstrap yet, you can install it with one of these package managers:
npm install bootstrappnpm add bootstrapyarn add bootstrapbun add bootstrapActivation
The extension will be automatically activated when:
- You have installed the extension
- Bootstrap is present in your workspace
- You open a supported file (HTML, JSX, Vue, etc.)
You should see a notification that Bootstrap IntelliSense is active.
Activation Status
You can check if the extension is currently active by looking at the status bar icon at the bottom of VS Code:
- Active: The Bootstrap IntelliSense icon is displayed normally in the status bar
- Inactive: The Bootstrap IntelliSense icon appears with a strikethrough
Getting Started
1. Open an HTML File
Create a new HTML file or open an existing one.
2. Start Typing
Start typing a Bootstrap class name:
<div class="container">
  <div class="row">
    <div class="col-md-6">
      <!-- Type here: btn- -->
    </div>
  </div>
</div>
3. Use Autocomplete
As you start typing, suggestions will appear automatically. Color-related classes show a color swatch right next to the suggestion:
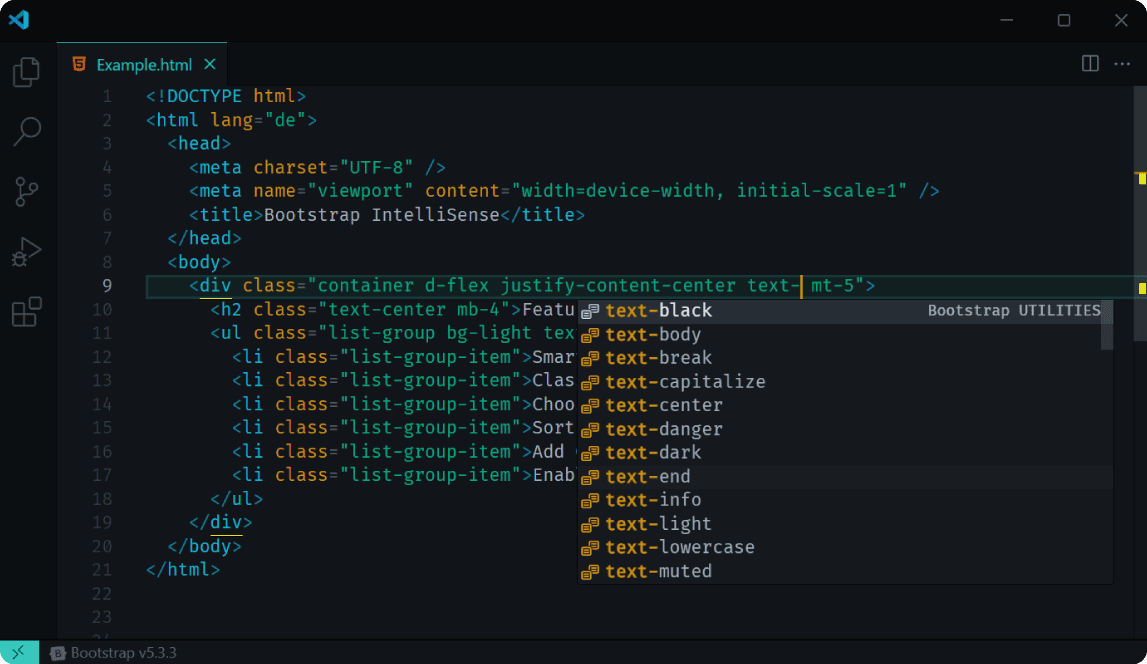
Tip
If suggestions don't appear automatically, press Ctrl+Space (or Cmd+Space on macOS) to manually trigger autocomplete.
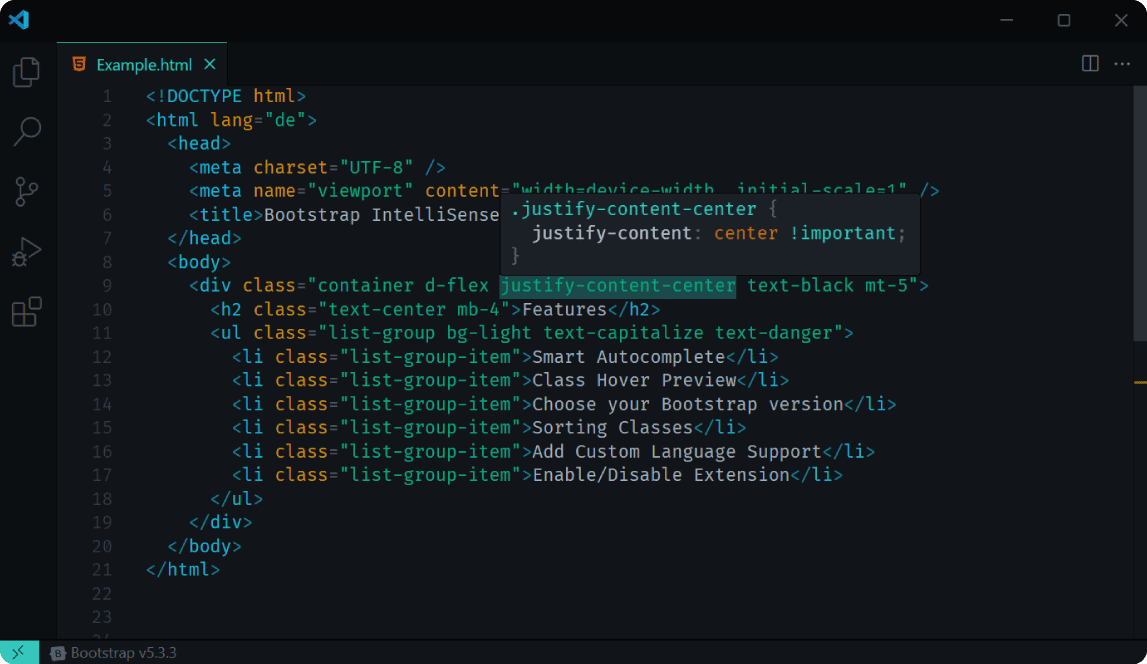
4. Use Hover Preview
Hover your mouse over a Bootstrap class to see the CSS properties. For color utility classes, a color swatch and its hex code are shown above the rule (transparent colors use 8-digit #RRGGBBAA):
5. Inline Color Swatches
While you edit, color utilities such as bg-primary or text-black-50 show a small color box directly to the left of the class name. Toggle this in the Status Bar menu or with enableColorPreview in settings (on by default).
6. Sort Bootstrap Classes
Keep class lists tidy in Bootstrap’s canonical order (Layout → Spacing → Components → Utilities):
- Command Palette → Bootstrap IntelliSense: Sort Classes in Current File
- Or enable
sortOnSave/ Enable/Disable sort on save in the Status Bar menu to sort automatically when you save.
Tip
Autocomplete, inline swatches, hover, and sorting work not only in class/className, but also in framework bindings (:class, v-bind:class, [ngClass], Svelte class:) and helpers like cn(), clsx() or cva() — including across multiple lines.